
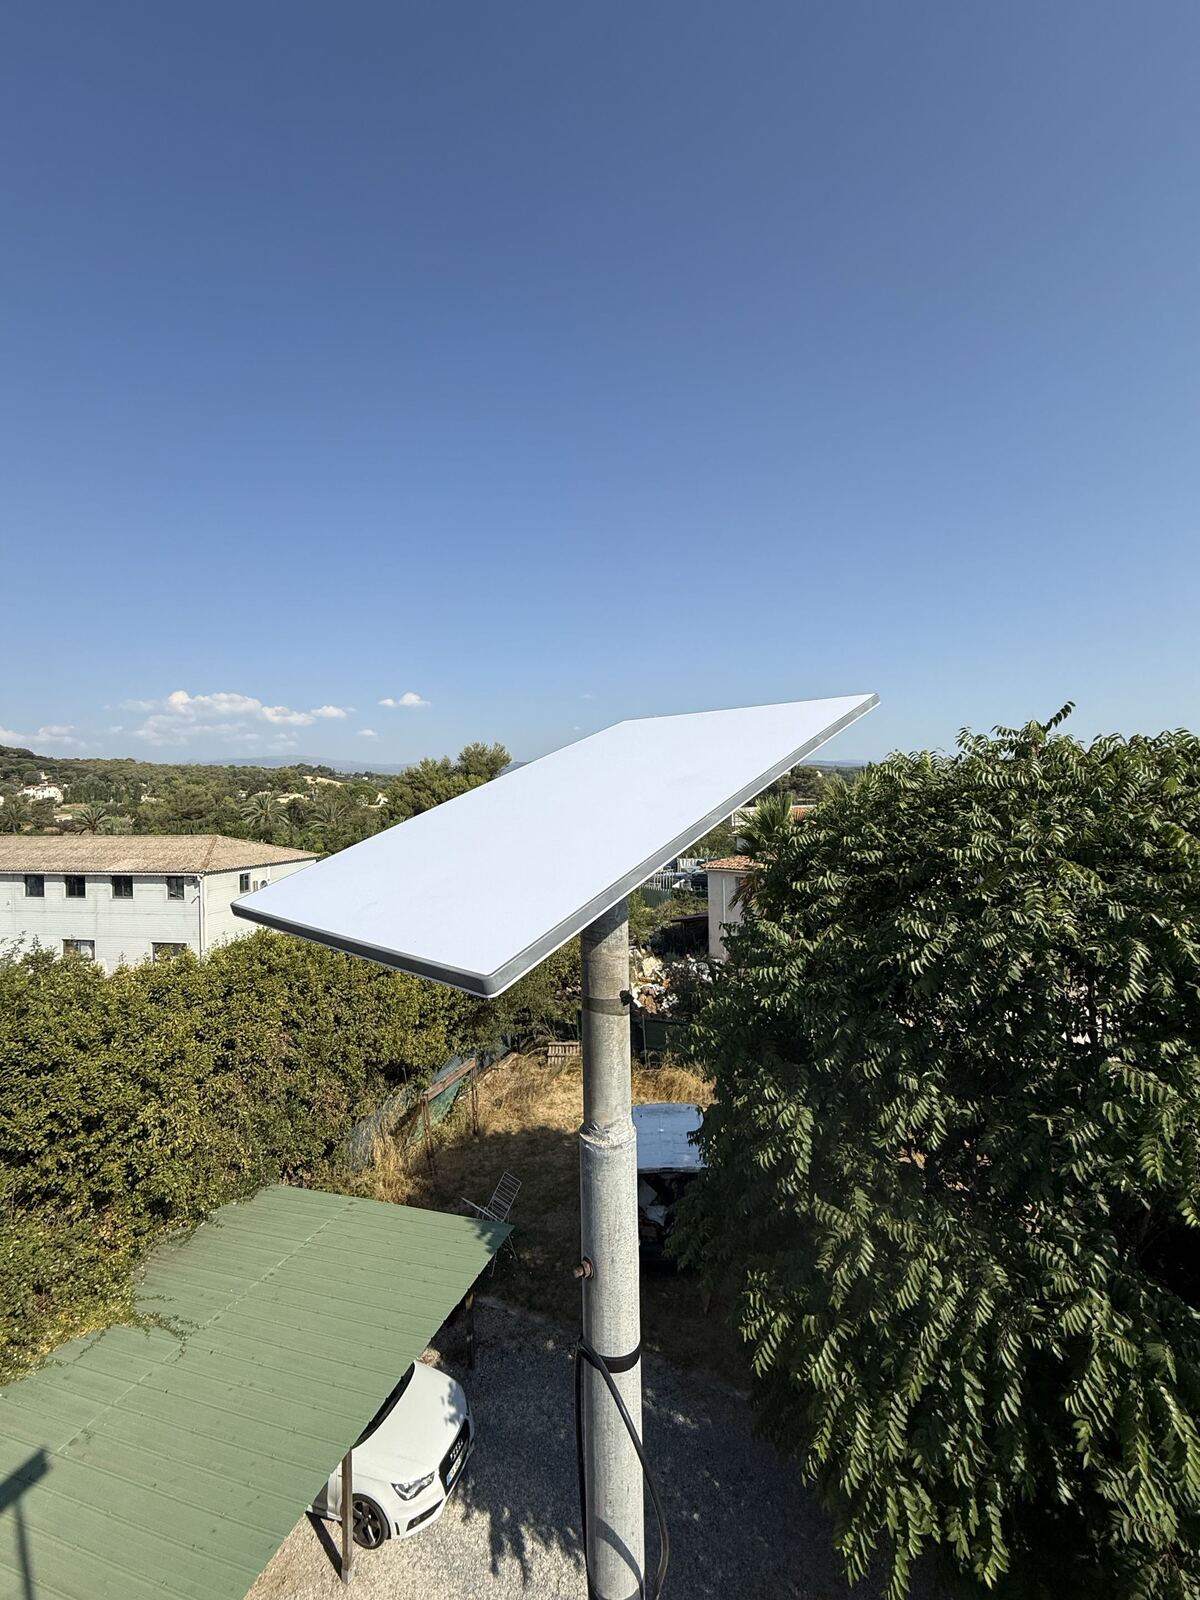
Starlink: high-speed internet via satellite
Starlink, SpaceX's satellite internet service, delivers high-speed connectivity where fibre and ADSL are unavailable or inadequate. With download speeds reaching 200 Mbps and low latency thanks to its low-earth-orbit satellites, Starlink is the ideal solution for rural or underserved areas across the Alpes-Maritimes (06).
Why choose Starlink?
- High speed everywhere: fast connection even in dead zones without fibre or reliable ADSL
- Low latency: between 20 and 40 ms, far lower than traditional geostationary satellites
- Flexible installation: the dish can be mounted on a roof, a wall, a mast, or even placed on the ground
- No phone line required: operates entirely independently
Why call in a professional?
Although Starlink is marketed as a "plug and play" kit, a professional installation guarantees optimal performance and a clean integration into your home.
The challenges of a DIY installation
- Choosing the right location: the dish requires an unobstructed view of the sky. Poor positioning causes frequent dropouts
- Secure mounting: the dish must withstand the mistral wind and the weather conditions of the Alpes-Maritimes
- Cable routing: the proprietary Starlink cable must be neatly run from the roof to the inside of your home without being damaged
- Earthing: essential to protect the equipment against lightning strikes, especially in exposed areas
- Electrical supply: a dedicated socket may be required near the router
Our Starlink installation service
1. Preliminary survey
We visit your property to:
- Verify Starlink coverage at your address
- Identify the best location for the dish (clear sky view, orientation)
- Determine the cable route and any work required
- Assess your electrical supply needs
2. Dish mounting
Depending on the configuration of your property, we carry out:
- Roof mounting: secured with a bracket suited to your roof type (tiles, slates, flat roof)
- Wall mounting: using an offset arm to clear the sky view
- Mast mounting: ideal for sites with obstacles such as trees or neighbouring buildings
- Reinforced fixings: sized to withstand the strong winds of the French Riviera
3. Cable routing and connection
- Neat routing of the Starlink cable from the dish to the router
- Run in a cable trunking, concealed in the wall, or along existing surfaces according to your aesthetic preferences
- Weatherproof wall penetration for the cable entry point
- UV and weather protection for all external cable sections
4. Configuration and commissioning
- Connection and power-up of the Starlink router
- WiFi network configuration (name, password, frequency bands)
- Speed and latency tests to verify performance
- Installation of the Starlink app on your phone
- Full explanation of operation and monitoring via the app
5. Additional options
- WiFi extension: if your home is large, we install mesh access points to extend coverage
- CPL socket: to distribute the Starlink connection to another floor via the electrical network, with no cable to run
- Ethernet cabling: wired connection of your devices for maximum throughput
- Earthing: lightning surge protection for the installation
- Dedicated power socket: creation of a supply point if required
Case study: Starlink installation in Antibes
Here is the sequence of a real installation, carried out on chemin de l'Orangerie in Antibes, with the standard Starlink kit.
Step 1: mast installation
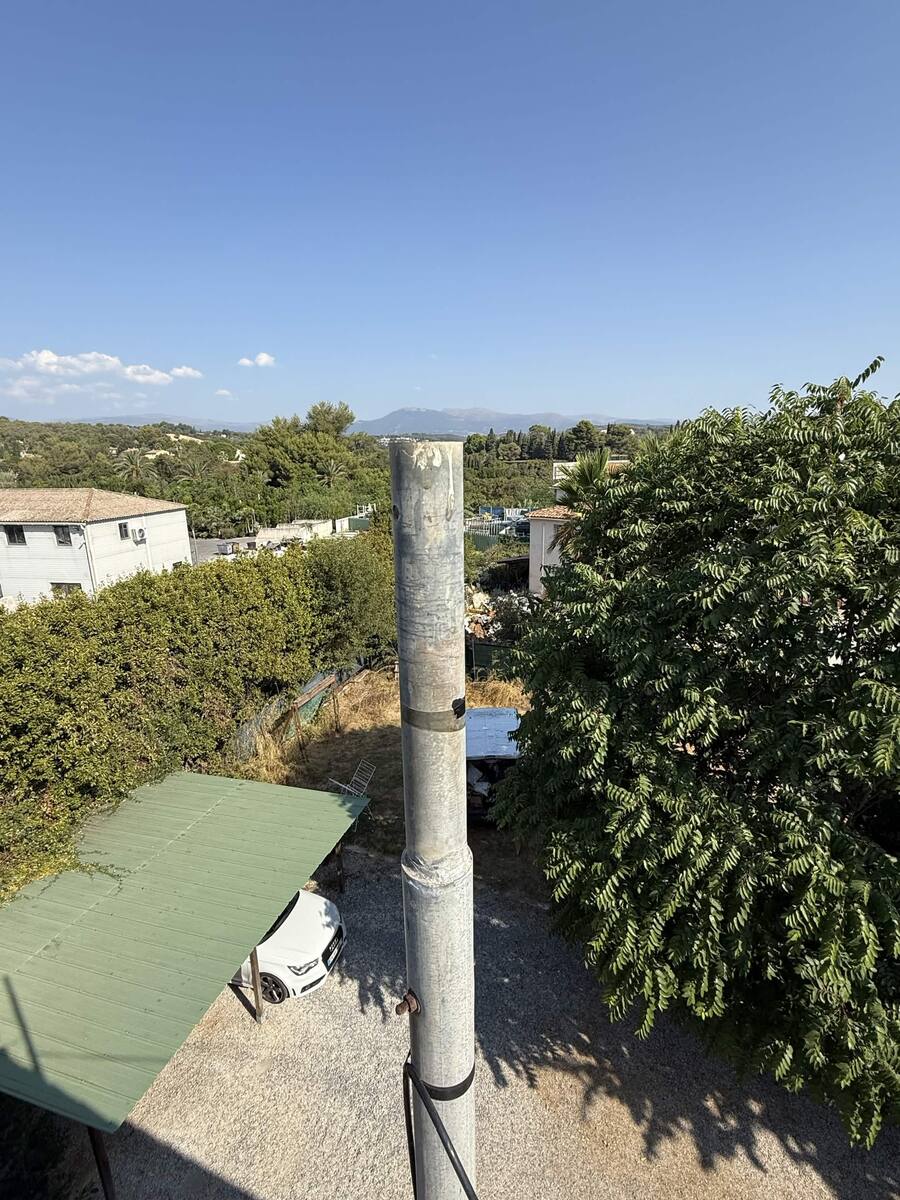
The sky was clear above the property, with no nearby obstacles (trees or neighbouring buildings), which made it possible to fix the mast directly at this location.
Step 2: dish alignment
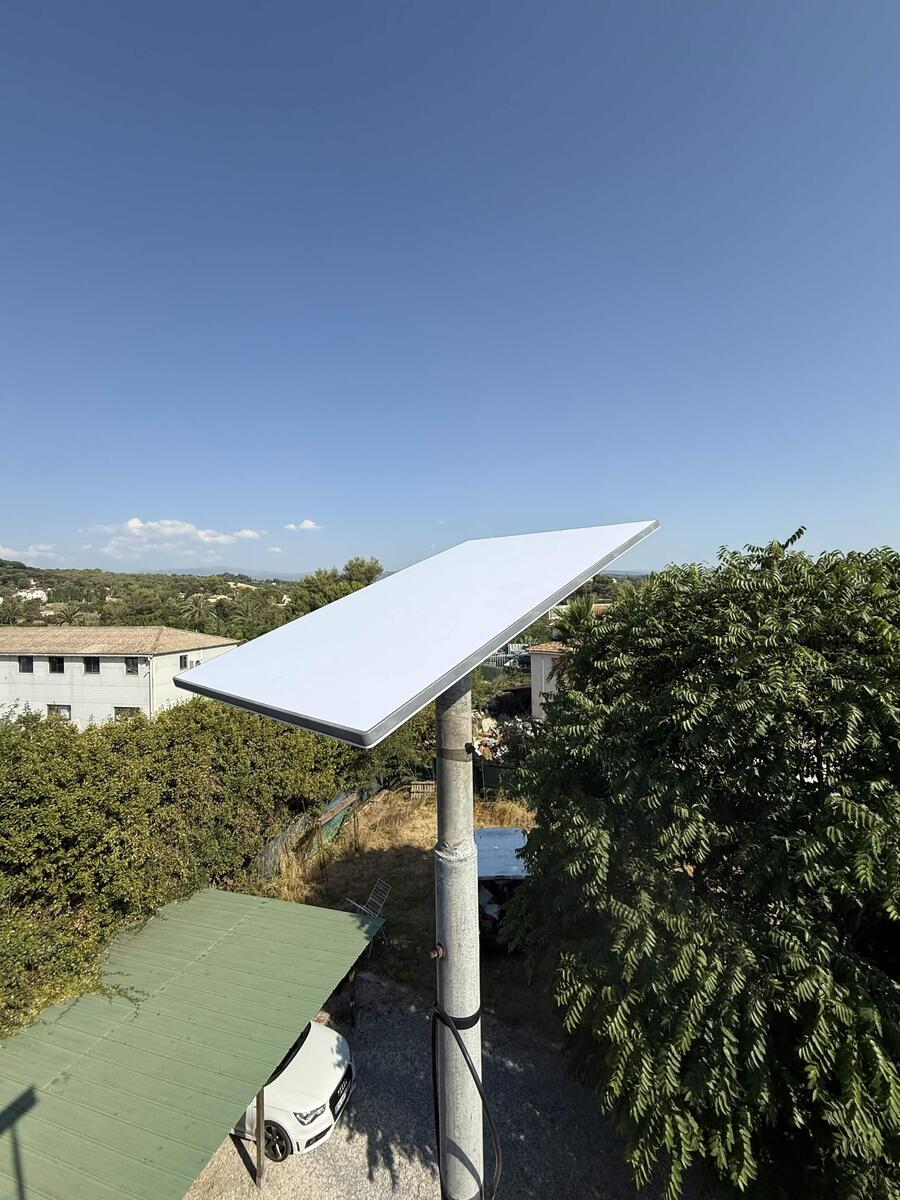
The dish orientation was carried out by carefully following the Starlink app, which indicates the precise angle needed to correctly capture the satellites.
Step 3: final fixing
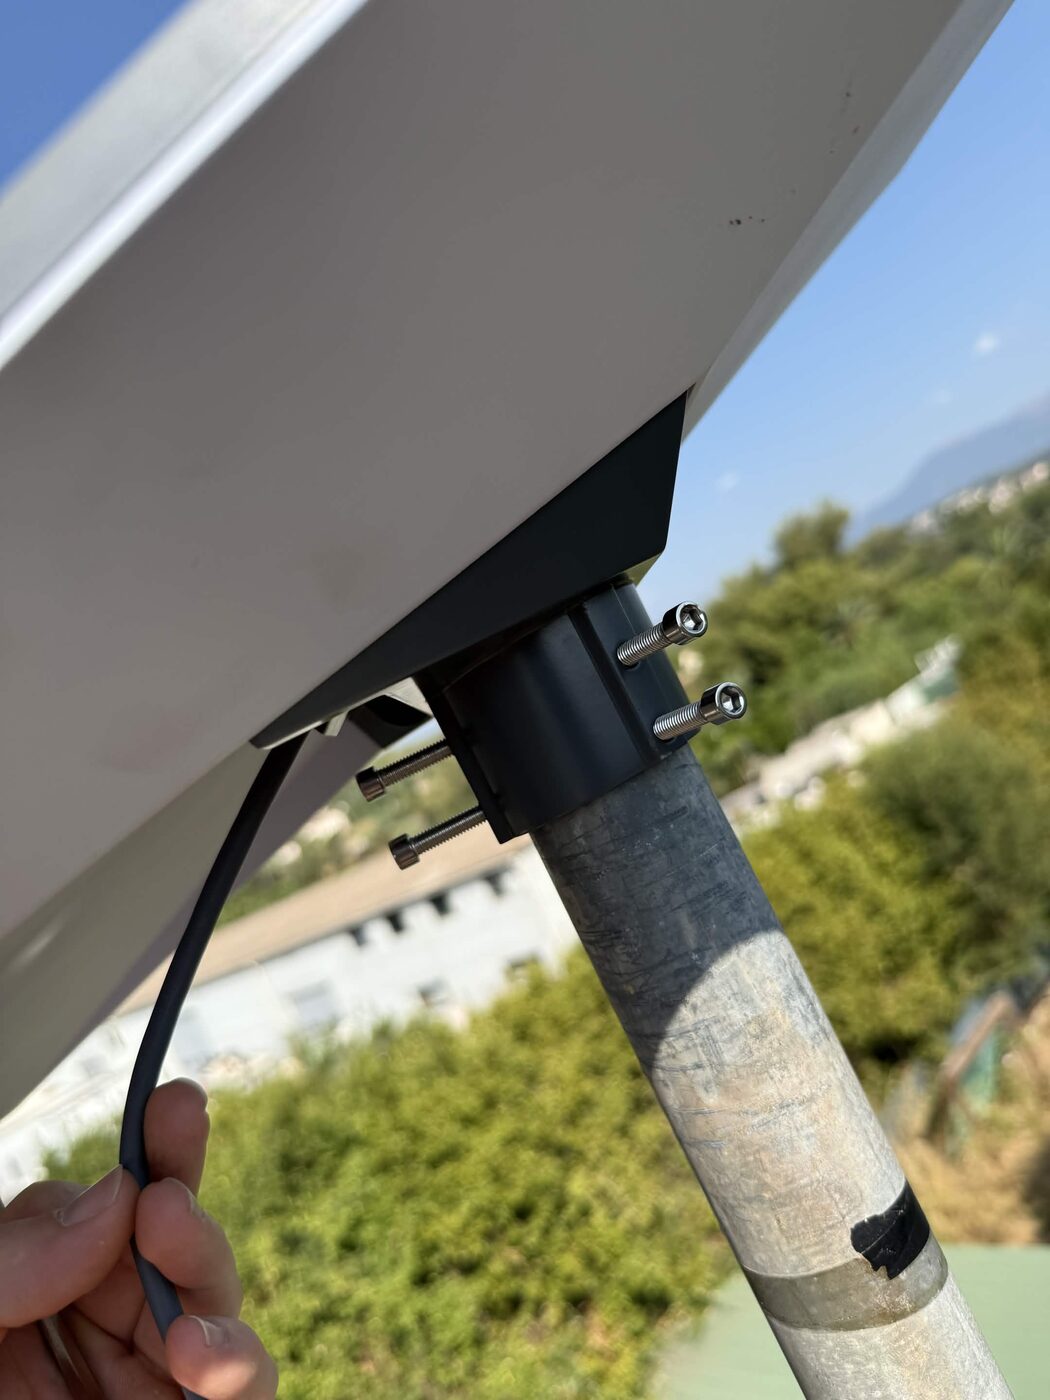
Once the alignment was confirmed, the dish is firmly fixed to prevent any "parachute" effect in strong wind, which could shift it and cause the alignment to be lost.
Step 4: checking the power supply and router
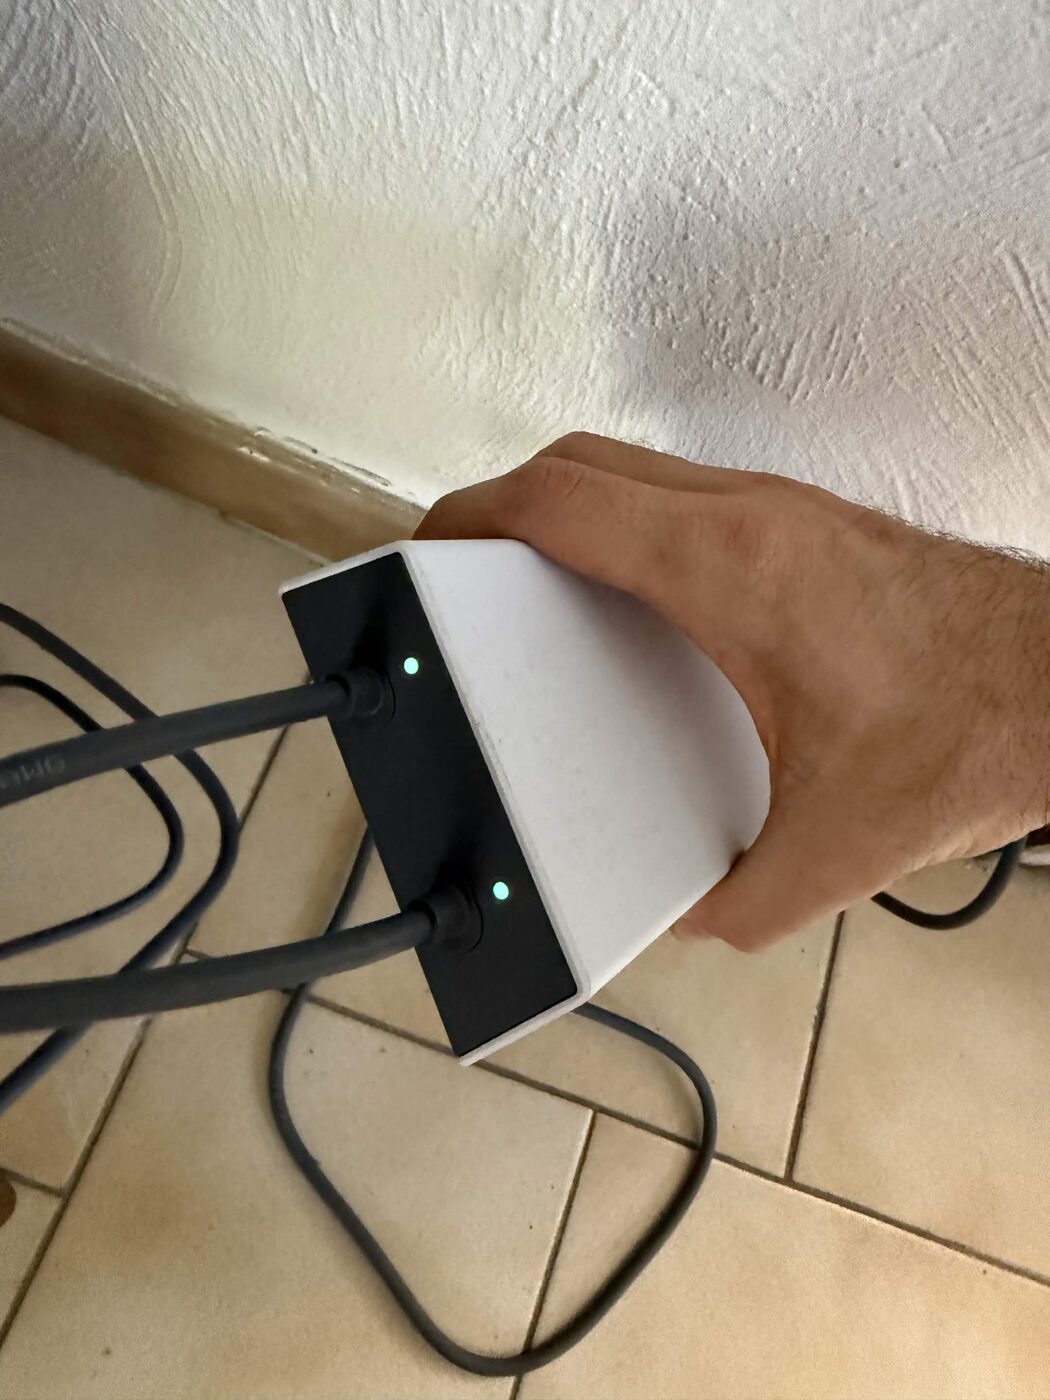
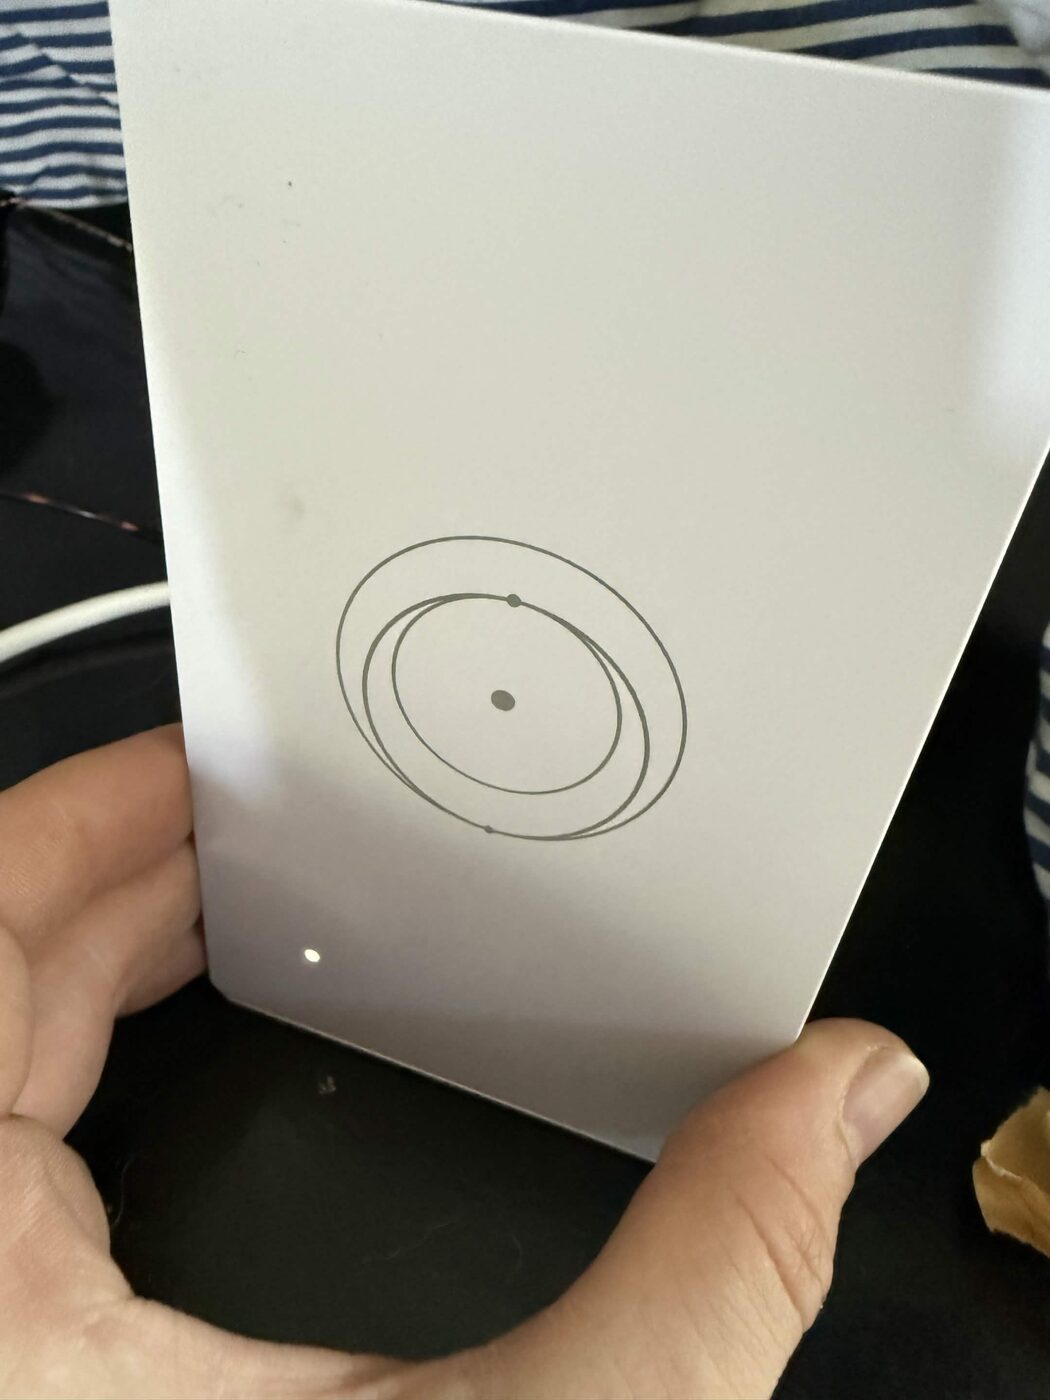
Final check before commissioning: the power supply and router indicator lights must be lit normally (a light blinking differently signals an error that needs to be fixed before finishing the job).
Step 5: WiFi speed comparison before/after Starlink
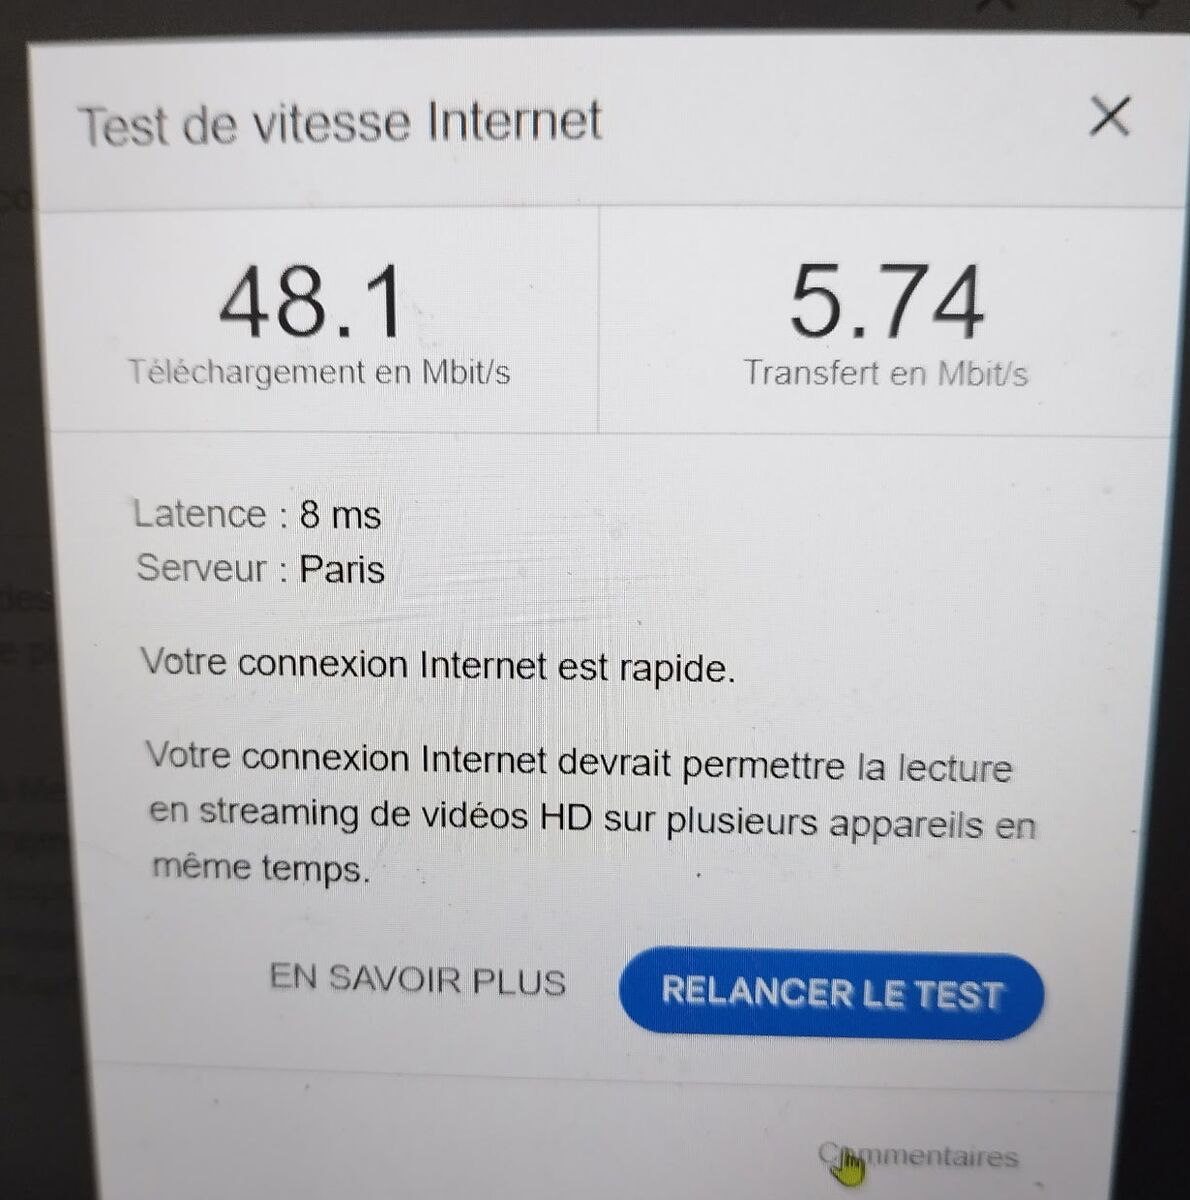
Before the installation, the client's old WiFi connection topped out at 48.1 Mbps download, 5.74 Mbps upload, with 8 ms latency (Paris test server).
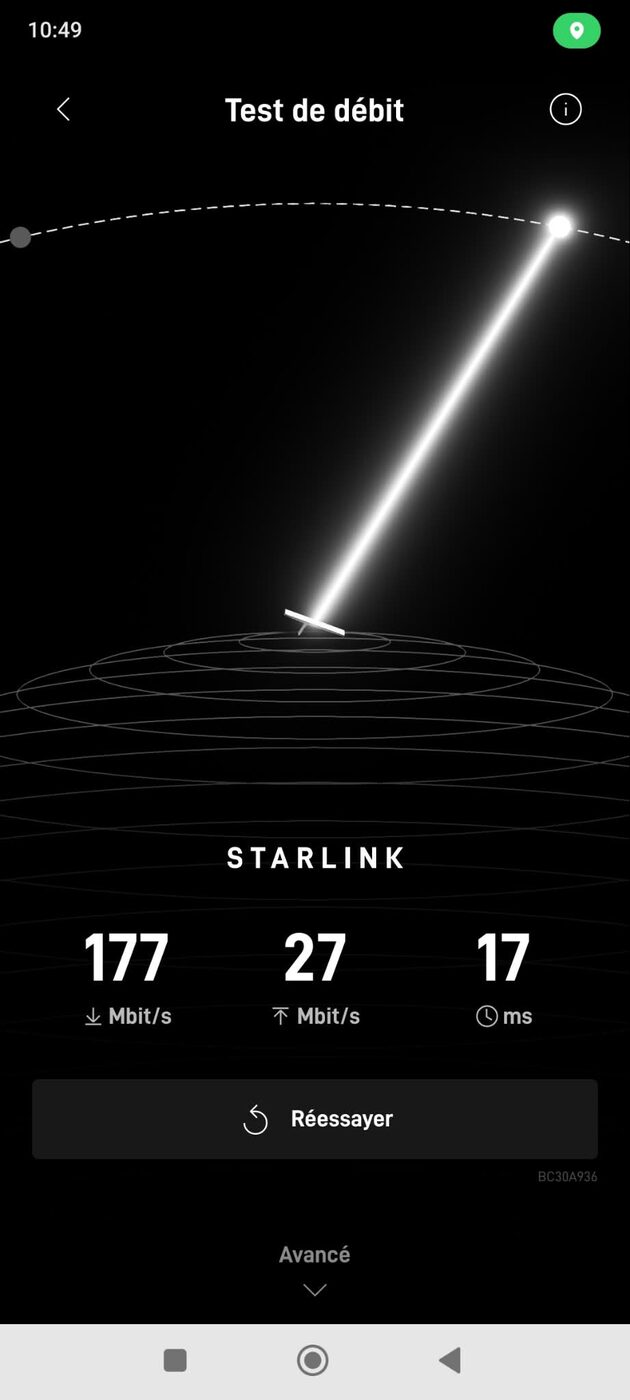
After the Starlink installation, still over WiFi: 177 Mbps download, 27 Mbps upload, latency of just 17 ms.
Download speed was multiplied by more than 3, plenty to enjoy video conferencing, HD streaming on multiple devices, or online gaming — areas where the old connection was already struggling to keep up.
Case study: Starlink installation at a campsite in Villeneuve-Loubet
We were also called out to the Domaine du Sourire de la Madone campsite, on route de Grasse in Villeneuve-Loubet, to install a Starlink dish on the roof of a house within the campsite.
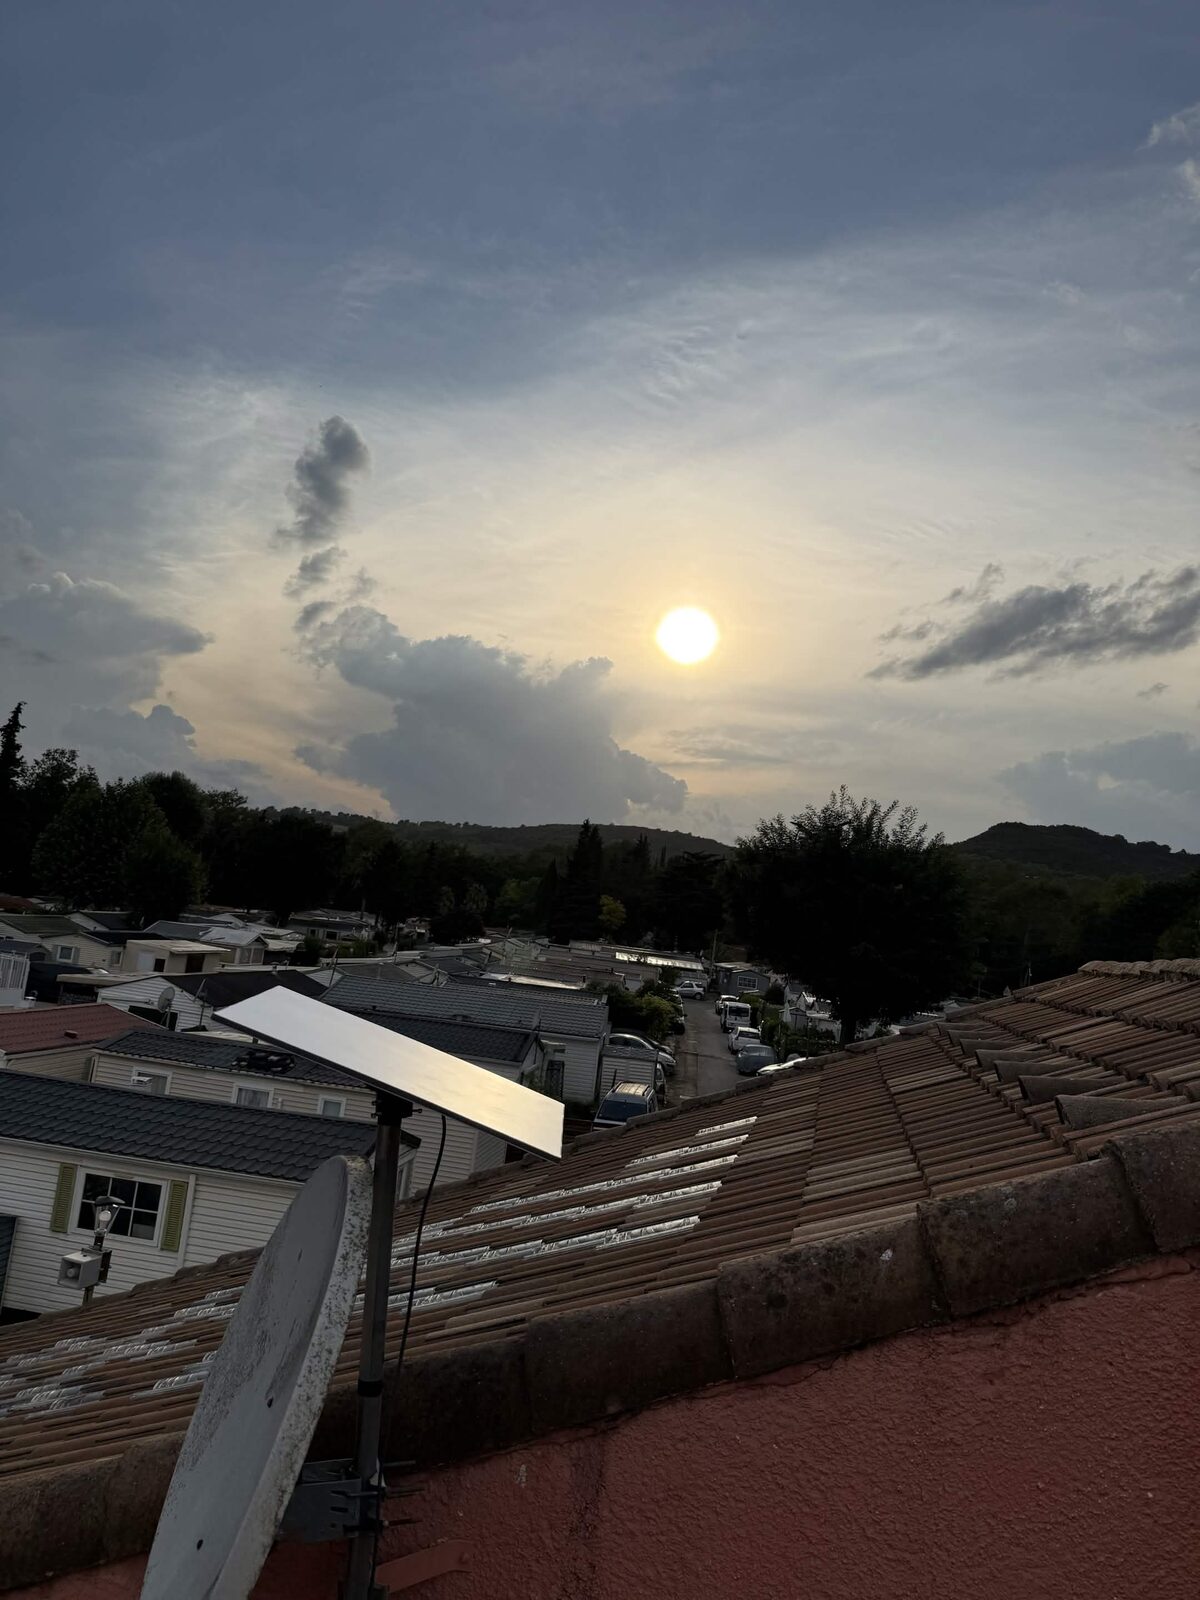
The mast was already in place on the roof, alongside the old TV aerial: we mounted the Starlink dish onto it, with a perfectly clear view of the sky to guarantee stable reception. This type of installation is particularly in demand at campsites across the region, whether on the on-site houses or on mobile homes, especially where fibre is unavailable or insufficient during the high season, when many households are connecting at the same time.
Whether for year-round use or for a mobile-home second home, we adapt the mounting (mast, wall or roof) to the specific constraints of this type of property.
Pricing and warranty
- Free quote: we assess your installation with no obligation
- 2-year warranty on the installation and all electrical work
- NFC 15-100 standard observed for all associated electrical work
- You supply the Starlink kit; we handle the complete installation
Starlink FAQ
What speed can I expect?
In the Alpes-Maritimes, Starlink users typically achieve between 50 and 200 Mbps download speed, with latency of 20 to 40 ms. Performance varies depending on network load and weather conditions.
Does Starlink work in the rain?
Yes, but heavy rain or snow can temporarily reduce the signal. A correctly oriented installation minimises these interruptions.
Do I need a permit to install Starlink?
Generally, no. However, in some residential complexes or protected areas, authorisation may be required. We can advise you on the necessary steps if needed.
Can I use Starlink for remote working?
Absolutely. Starlink's low latency and high speeds support video conferencing, VPN connections, and all professional applications without any issues.
For any questions or additional information, you can reach us at 06 95 62 24 33, Monday to Friday from 9am to 6pm. Outside these hours, this line is reserved for emergencies, available 24/7.